THE INFRADIATOR 3000


I was walking back from lunch when I noticed this gorgeous beauty sitting by the dumpster. Before I could process what was happening, it was in my trunk. I learned from a coworker (and friend) that it came from his apartment, and he was throwing it out!
After I was resuscitated from my double heart attack, I began to formulate a plan for what I would turn this into. Originally built in 1886 by the Cleveland Foundry Co, I didn’t just want to hack up this gem for my own twisted desire. Instead, I wanted to make it shine.
That was when I had an idea... 💡


THE ENDOSKELETON
The first thing I set about doing was creating an internal frame that could support all of the lights, wiring and the heating tubes. It was important to me that this process was done in a non-invasive way, so that I could maintain the integrity of the original piece as much as possible. These design constraints would pose a challenge. How would I manage to keep everything in place without fastening the insert to the frame? The answer came in the form of a collection of bent and straight copper pipe hangers that I bolted together. The bottom plate of the radiator's "shell" would keep everything "pressed" together when it was upright.
EDISON or TESLA?
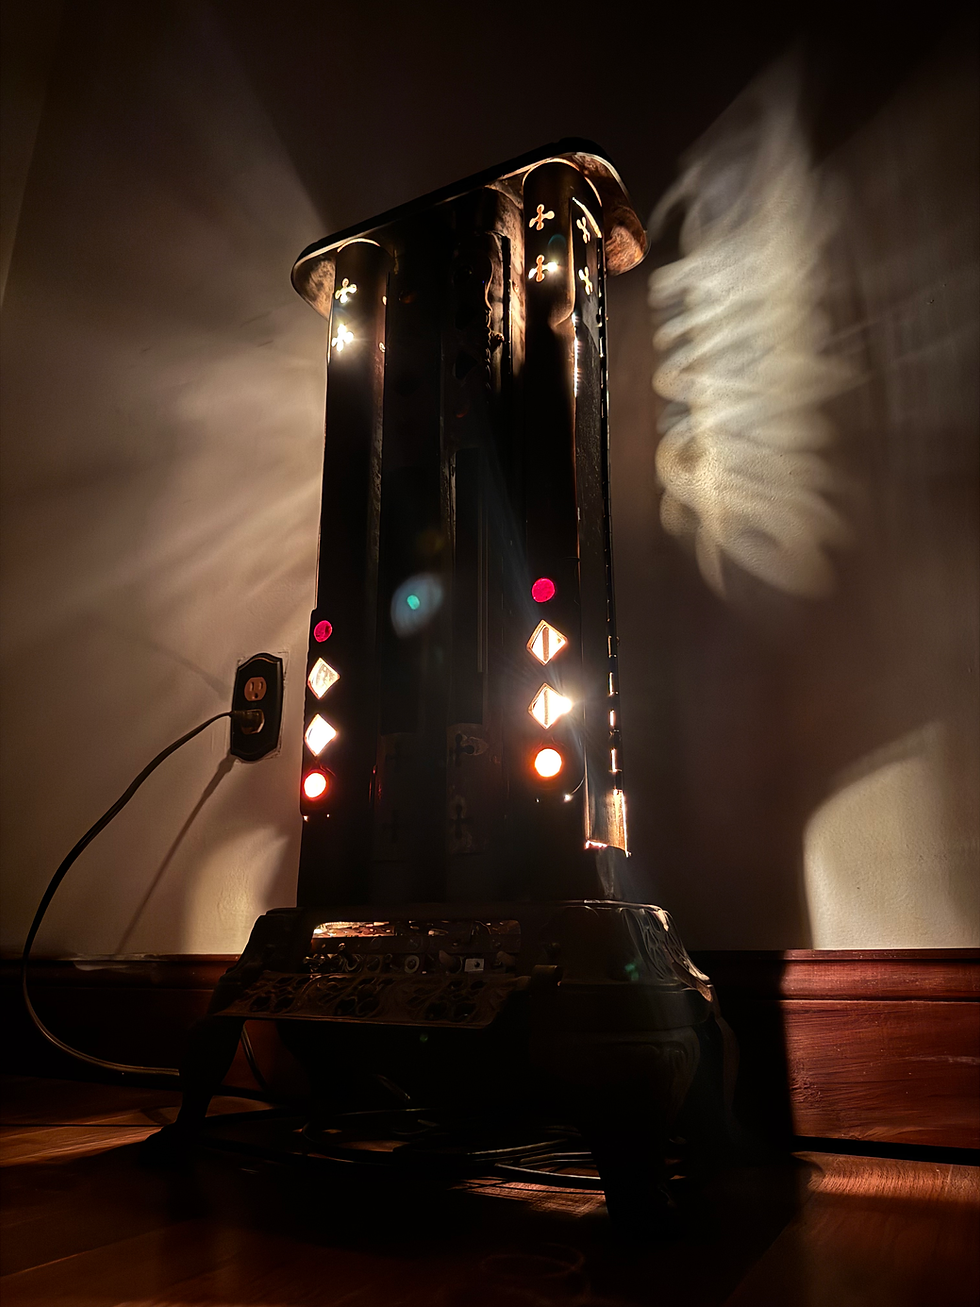
Once the endoskeleton was in place, I was finally able to work on the wiring for the lights. From the beginning, I wanted the piece to give off an atmosphere representative of the elegant antique it is. For this, I chose elongated, LED Edison bulbs. Despite my preference for Nikola Tesla over Edison, these bulbs did the trick. Keeping in time with the feel of antique lamps, I also chose this braided golden cord to house the wires. Although it can only be seen when the doors are open for maintenance or style, I love the way it elevates the appearance of the radiator. Adding to the mood, I salvaged two dimmer switches and wired them into the main control panel. In addition to the dedicated ON/OFF switches present for the top row of lights and the bottom row, the dimmer switches themselves also contain a switch. This redundancy is just that- but I love it! Another fun fact: Each door of the radiator tubes is held in place by a hidden magnet!


INFRARED INSTEAD
The lights were working, and the endoskeleton was not complaining. It was finally time for The Infradiator 3000 to get its namesake. This was originally a gas radiator that used a flame to heat the room. For several reasons, that was not ideal for me, so I decided to turn to a more electrifying method. Growing up with my body pressed against a space heater, I had become a connoisseur of the different types. By far, my favorite was infrared heat. Not only does it provide a cool orange glow and save on energy costs, but the method of transfer was also the most fascinating. Unlike other heaters that rely on air blowing over a hot element that then heats the room, infrared heaters emit infrared waves that directly heat what they touch. These waves are just below the visible light spectrum, but the elements often get hot enough to begin emitting that cozy amber glow. I was able to get my hands on some near perfect heating elements from quartzinfrared.com, with the only caveat being that they were a little too short to fully close the circuit. After a few modifications, the heating prototype was complete! There was just one problem, well, two. Actually, three. 1. The spring-loaded receptacles I was using to hold the heating elements could easily dislodge the element if they weren't seated properly. This made the doors and a future security mesh very important for safety while operating. 2. The copper pipe hangers I used initially held onto heat for a while, and also had a tendency to discolor and scorch after short periods of use. I was able to find a solution to this by replacing the support behind the heating element with an aluminum piece instead. This allowed for quick heat dissipation and no discoloring. 3. When the heaters were turned on, something inside the radiator, aside from the copper hangers, would smoke. After isolating and experimenting, I have a theory that this could be some leftover residue or soot from its old life as a fireman. (coal-fired boiler joke).
FEATURES OF THE FUTURE
With each problem I solved, the vision became clearer. Though I am proud of how far I've come, there are still steps left to complete.
Here are a few features of the future: I plan to add a nice golden wire mesh over the heater doors for both style and safety. I would also like to add a light trim to the outside of the doors to cover up the first time I used an oscillating multi-tool. I will then ensure the electronics are more insulated to prevent future shorting, and install an emergency heat shut-off like the one present in a traditional space heater.
Until then, it is a very cool lamp!
Stay tuned for updates, and thank you for reading! :)

